Search for answers or browse our knowledge base.
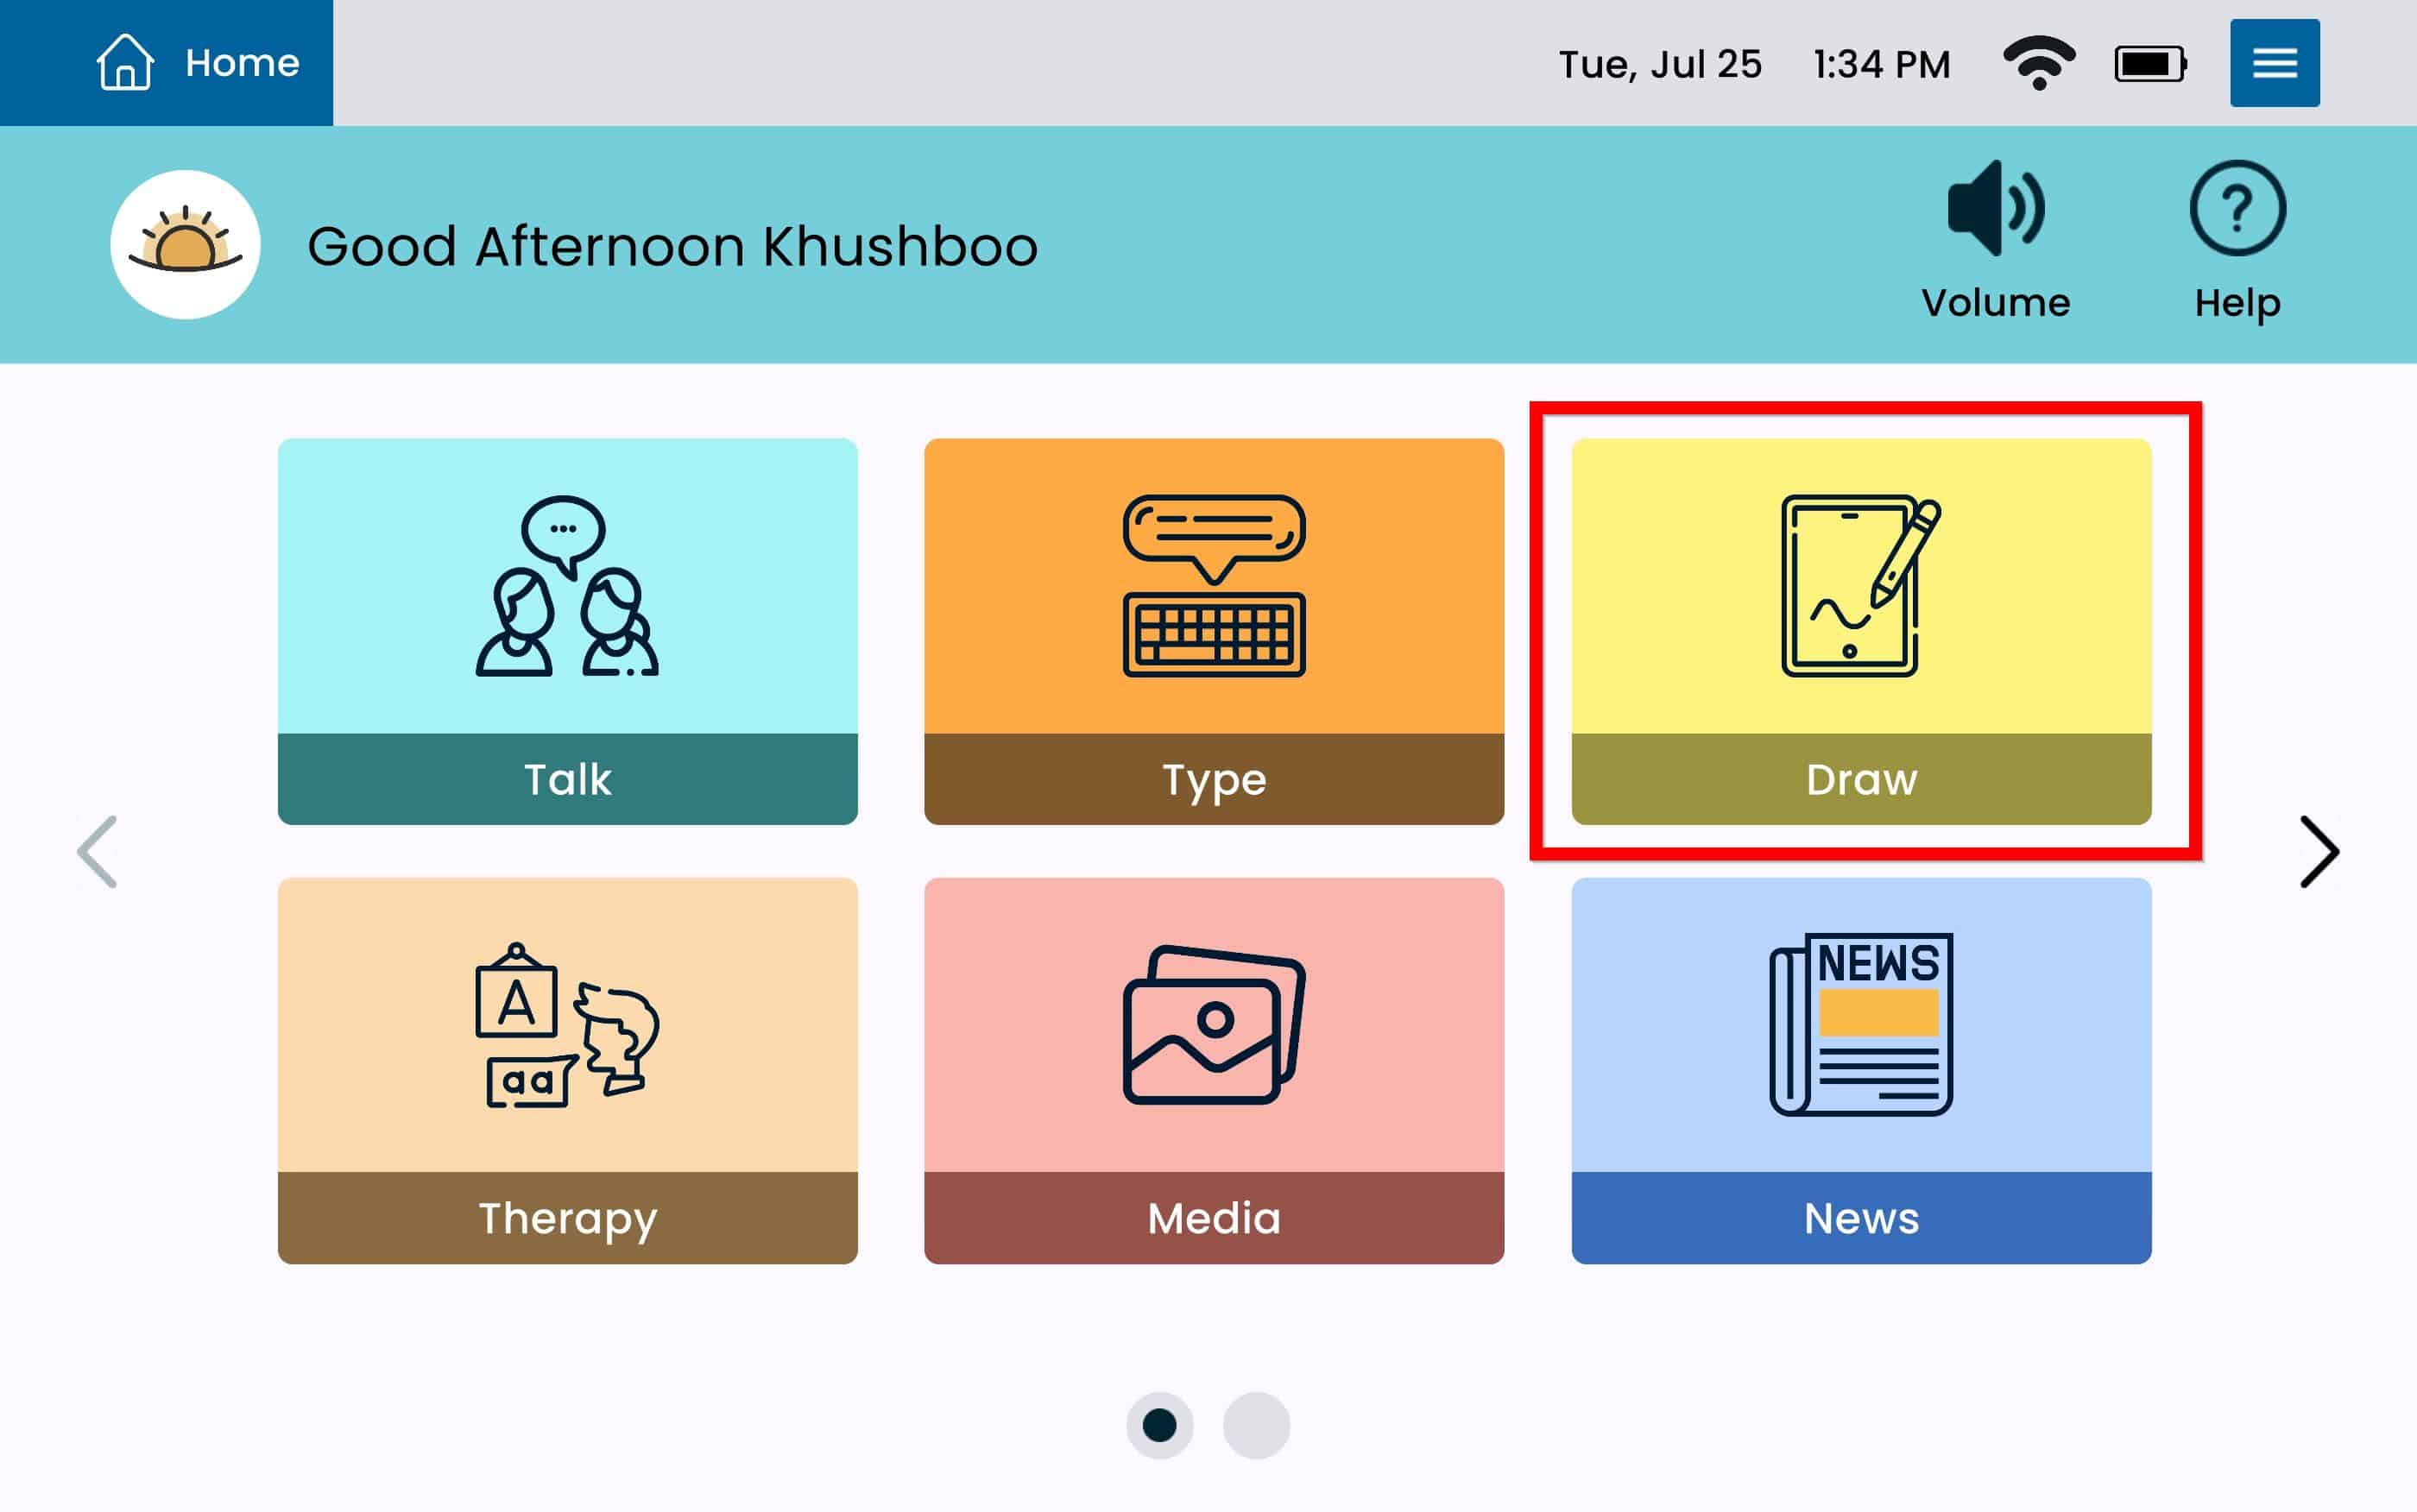
Launch Draw
- From Home, tap Draw

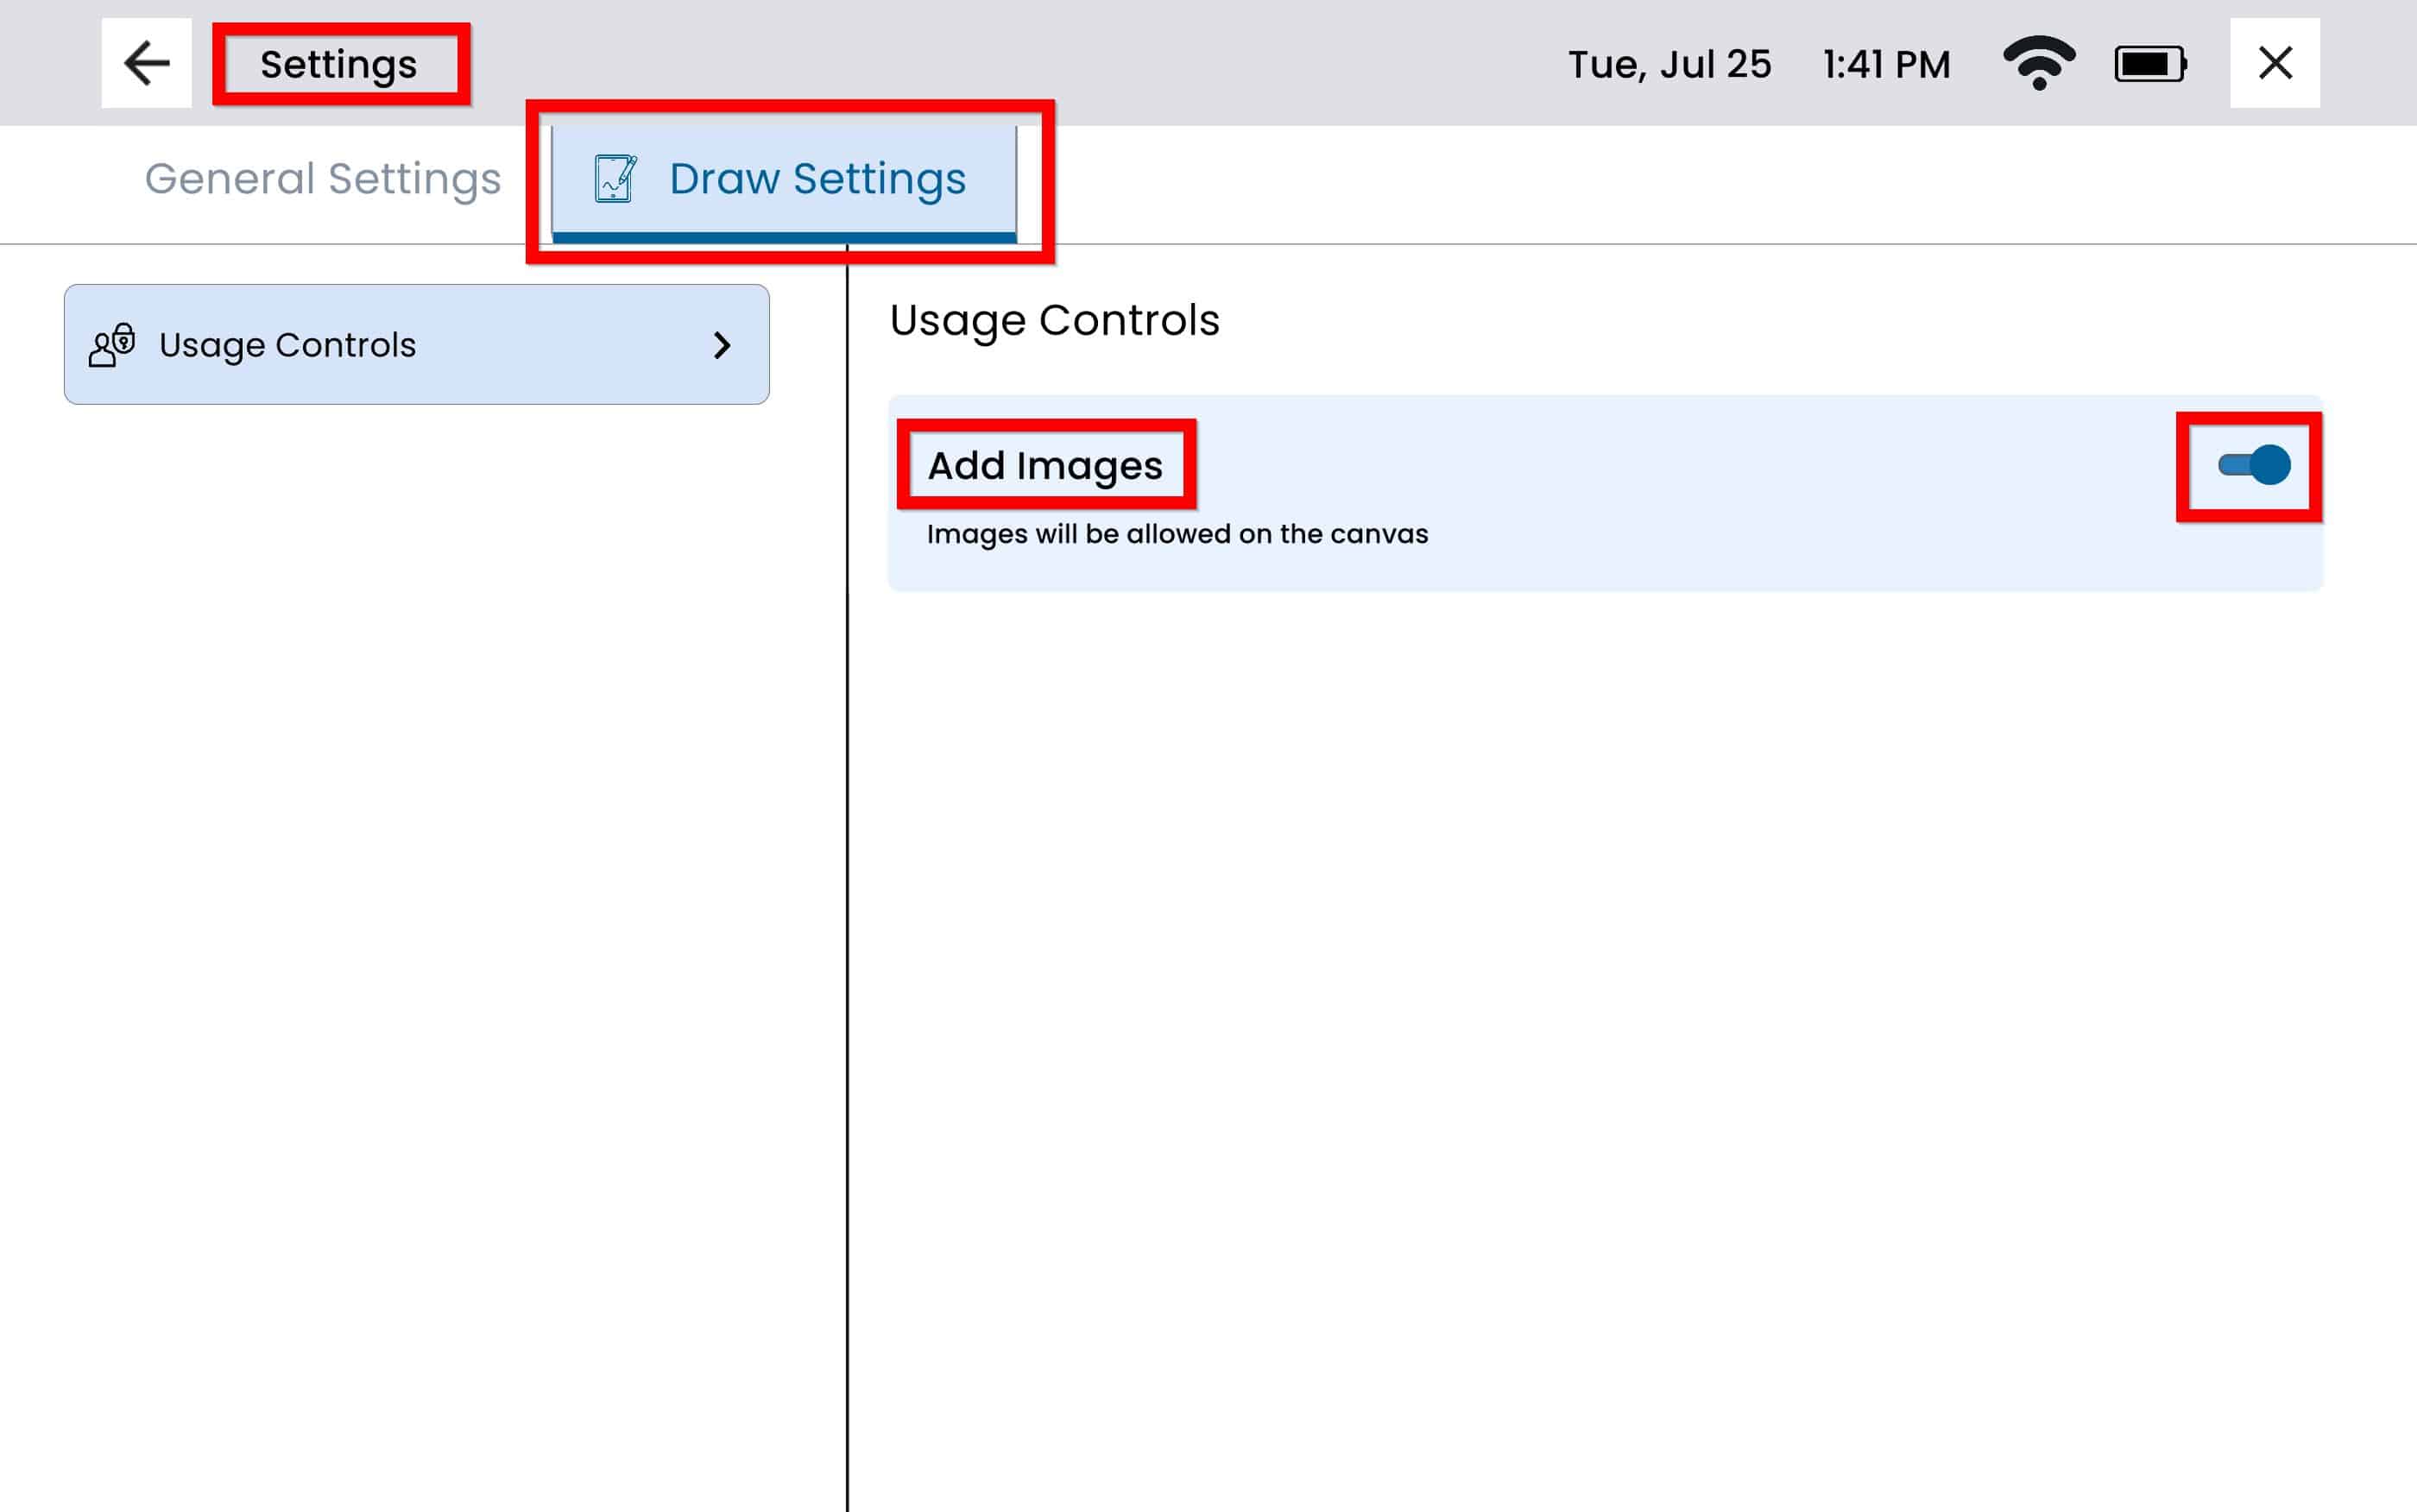
Draw Settings
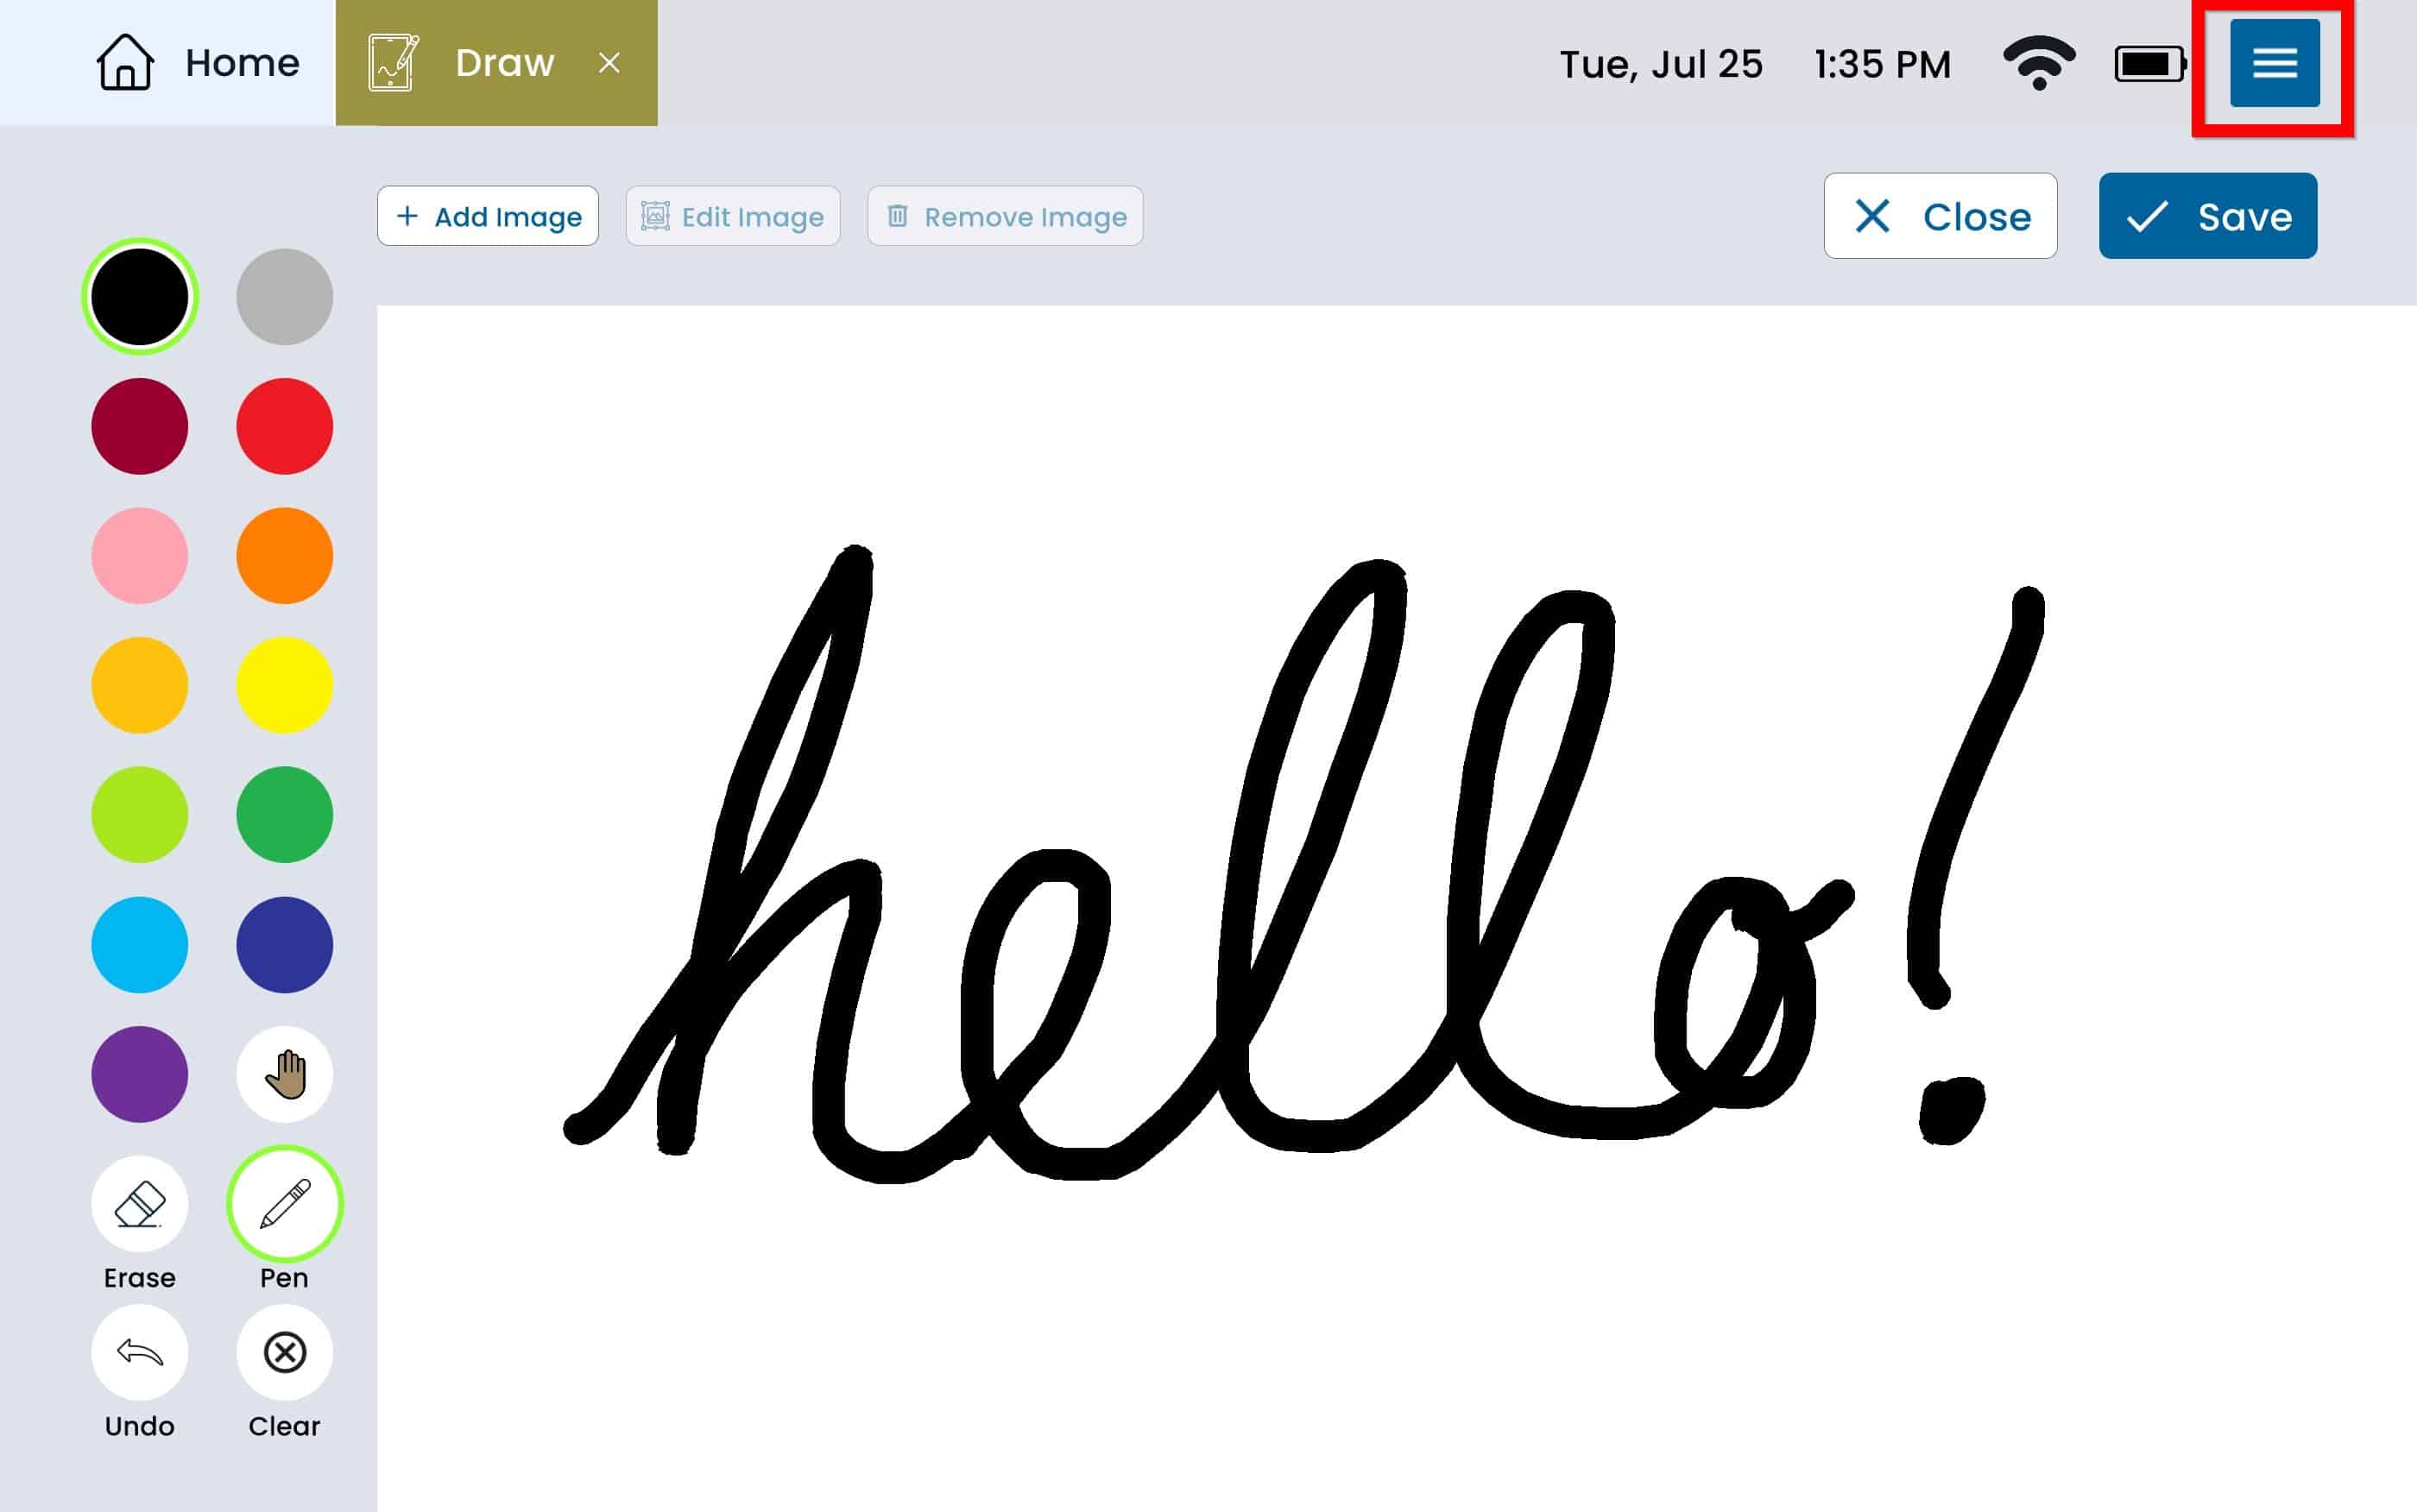
From Draw, tap the Settings Menu Button which gives you direct access to Draw Settings

To enable adding images, select the toggle button next to Add Images, the toggle button will display to the right if the setting is turned on, and left if the setting is turned off.

Erase, Undo, and Clear
Erase
- Allows you to use your finger as an eraser.
Undo
- Will “undo” whatever single action you just did. You can continue to tap undo until you clear the canvas.
Clear
- Will clear the whole canvas
You can see which one is in use as it highlights with green or blue.
Add an image
From Draw select Add Image on the top left of the canvas. This will launch 3 options:
- Take a photo – Capture a picture right in the moment
- Photo Gallery – Select a photo from your existing album
- Web Search – Look for an image on the web
Once the image is selected it, it will add it to the canvas.
Edit an Image
Once an image has already been added, you will see Edit Image on the top left of the canvas. Select Edit Image, this will allow you to:
- Resize an Image – Adjust the image size by clicking the plus button to zoom in, or plus button to zoom out. You can also use two fingers and pinch in to zoom out, or pinch in to zoom in.
- Move an Image – Simply touch the middle of the image and drag it to your desired spot on the canvas.
Once you are done editing an image select Done Editing on the top left of the canvas to exit the image edit mode.
Remove an Image
- Once an image has been added, you can remove the image by selecting Remove Image from the top left of the canvas.
- Select the trash can icon on the top right of the image.
- Once the image has been removed, select Done Removing from the top left of the canvas.
Save to Gallery
- To Save an Image, select the save button on the top right of the canvas. Please note, the save button will not be available if you have edit image enabled, or if you have remove image enabled. To enable the save option you must select ‘Done Editing’ or ‘Done Removing’.
- Select Save to Gallery.
- Your image will now be available to view on the Media app under the Drawings tab on the left panel.
Create a Card
- Select the save button on the top right of the canvas. Please note, the save button will not be available if you have edit image enabled, or if you have remove image enabled. To enable the save option you must select ‘Done Editing’ or ‘Done Removing’.
- Select Create a Card.
- Under Select Card Type, select Communication.
- Under Card Name, add a name for the card.
- If you would like the spoken message to be different from what you have named the card, add the spoken message in the Spoken Message box.
- Select Save on the bottom right of the screen. Please note, the device will not allow you to save a card unless it has been named.
- You will now be able to see the card when accessing the Talk app.
Still Need Help?

Call us now at 888-274-2742, option 5. We are available from Monday to Friday between 8am and 8pm ET. Si, hablamos Español!
You can also click here to schedule an appointment.


